You have an Zoom Pro account through your UW NetID while you are enrolled in UW courses. Here are some basics for using Zoom in your courses. More information is available at UW Zoom Video Conferencing.
What You Need
- A device that meets the current System Requirements for running Zoom.
- An internet connection—broadband wired or wireless.
- A headset is recommended as using your computer audio can cause feedback.
- A webcam—built-in or USB plug-in is recommended.
- Download the Zoom application and install
You may also want to check out Secure devices you use with Zoom.
Zoom Meeting Access and Experience
A link to your Zoom meeting should be in your Canvas course, either on the Zoom page (follow the Zoom link in the lefthand navigation) or on the main course page. Click the link to access the course; we recommend logging in 5-10 minutes early for your first class to ensure everything is set up properly. To access your UW Zoom account, which may be required for your class sessions, you need to Sign In to Zoom using SSO (expand Sign in to UW Zoom (desktop app) to see the instructions).
NOTE: If you run into permissions issues, double-check that you are not signed into Zoom using a different account.
Connecting Audio and Video
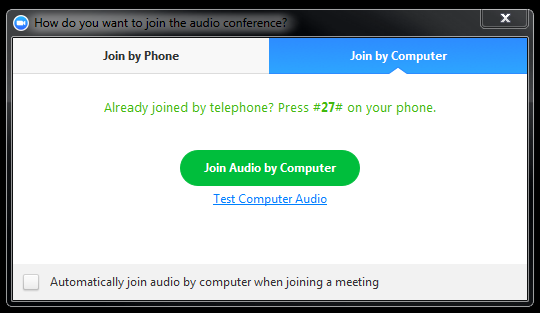
When your meeting opens, you will be prompted to join the room's audio. Zoom allows audio participation through your computer's audio or a phone line. We recommend using a headset with your computer's audio. You can also Test Speaker and Microphone here to ensure your best audio experience.
NOTE: If you check the box by Automatically join audio by computer when joining a meeting, you will not see this popup when joining future meetings.
Depending on your Zoom settings and those of the room, you may come in with your video feed on. We do recommend enabling Turn off my video when joining under the Zoom application's Video settings to ensure you determine when you are camera ready. If your instructor requests that you share your Video, please be prepared to do so.
If you need to change your audio/video input device, click the arrow next to the microphone/camera icon and select the appropriate device. This is also an easy way to change your Zoom application Audio and Video settings.
Mute/Unmute Your Audio
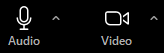
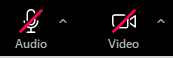
Your Audio input is controled by the microphone icon in the lower left corner. It toggles between mute and unmute when you click it. A red line through the icon appears when your audio is mutued.
Start/Stop Your Video
Your video input is controlled by the camera icon to the right of the microphone icon in the lower left corner. It toggles between broadcasting your video feed and broadcasting no video feed. A red line through the icon appears when you are not broadcasting your video feed.
Meeting Controls Menu
Some options covered in the Hosting Your Own Meeting section below may be enabled in your class meeting.

Participants
The Participants list shows everyone in the meeting room, including your instructor(s) and fellow students. To open the Participants list, click Participants on the Meeting Controls menu at the bottom of your meeting screen. This opens the Participants list (either on the right-hand side of the meeting screen or in a popup window) and lets you see the status of everyone's Audio and Video. It also gives you some options if you hover over your name:
- Mute/Unmute
- By hovering over your name in the Participants list, you can chose to mute/unmute yourself.
- Ellipsis menu
- If you expand the ..., you may have options (depending on the Host's settings) to:
- Edit profile picture
Lets you change the profile picture that displays when your Video is off. - Rename
Lets you change your display name in the meeting.
- Edit profile picture
Chat
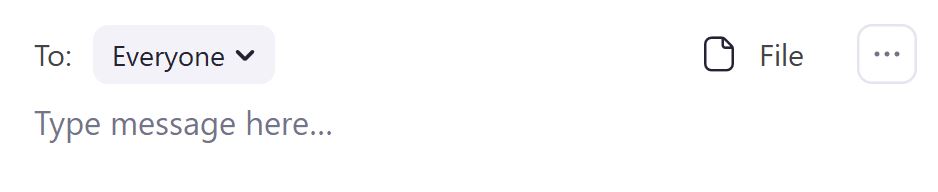
Depending on the Host's settings, Chat messages may be sent either to everyone in the room or privately to specific participants. The To field starts out defaulted to Everyone (if enabled) but if you change that, it stays changed. If you want to change the current value of the To field, select the appropriate option from its dropdown menu. You can also click on anyone's name in the Chat or from their box to select to send them a private message. If enabled, you may also be able to share Files or Reactions within Chat.
NOTE: Any chat messages sent before you joined the meeting are NOT included in your Chat window.
NOTE: Your instructor may choose to disable private chat.
Save Chat
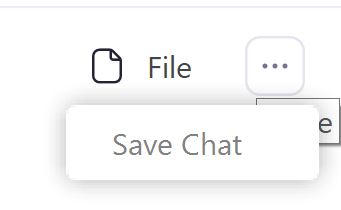
If enabled, you can save the chat transcript by opening the ... drop-down menu and selecting Save Chat. You can also turn on Auto saving chats in your Zoom profile settings. If you save chats locally to your computer, chats from all meetings you are in while signed in to your Zoom account will be automatically saved.
Hosting Your Own Meetings
You may Host meetings for group work or study sessions that involves Zoom functionality you may not use in the classroom.
Share Screen
Share Screen allows Hosts, Co-Hosts, and anyone else the Host has enabled to share their screen, an application window, Documents, or Advanced options. After selecting Share Screen, Zoom opens a popup window showing your available computer screens and each active application that you can select to share, with other tabs for Documents and Advanced options that let you share a whiteboard or a connected iPhone/iPad. Once you select what you want to share, click the blue Share button.
When you Share Screen, the Meeting Controls menu pops out and reconfigures, adding a few options and moving others to the …More icon. To reposition the menu, simply click and drag. To end the screen share, choose Stop Share. If you have hide controls on, the controls will only display on hover.

NOTE: The default setting has Share Screen opening full screen. If you are not already in full screen mode and have Participants and Chat open (displaying on the right-hand side of the meeting), these windows may become hidden in the move to full screen. Either click Exit Full Screen in the upper right corner or click on Participants and Chat to display these windows again.
Annotation 
The annotation toolbar allows whoever is sharing to draw and make comments on the shared content or whiteboard. If you have enabled annotation in your Zoom account profile settings, when anyone shares, the Annotation menu comes up automatically. If you enable allowing others to annotate, then when someone else is sharing other Participants can access an annotation menu by going to View Options at the top and selecting Annotate.
Recording
As a meeting Host, you have the ability to record or to allow individual Participants to record to their computer. You should check your Recording settings prior to any meeting that you wish to record.
In the Participants list, a recording icon appears next to any participant who is currently recording.
Video Recording and Chat Transcript
Once the meeting has ended, your recording begins to process. Meeting recordings and chat transcripts are created as separate files. Messages contained in the chat transcript will have timestamps.