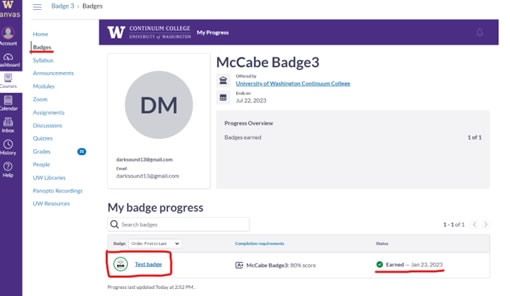
From your Canvas course, click the Parchment Badges link in your left-hand course navigation menu. This brings up the list of your available course badges and when you have earned them. Click the badge name in the left column to view its details.
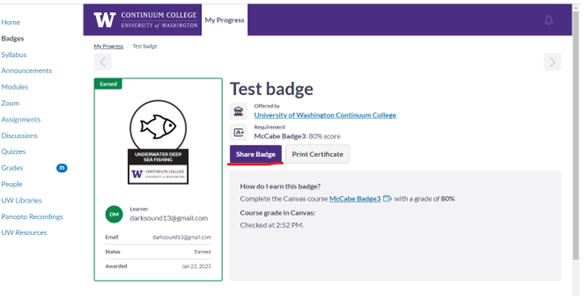
The My Progress screen provides more detailed badge information, as well as a purple Share Badge button that opens a popup window.
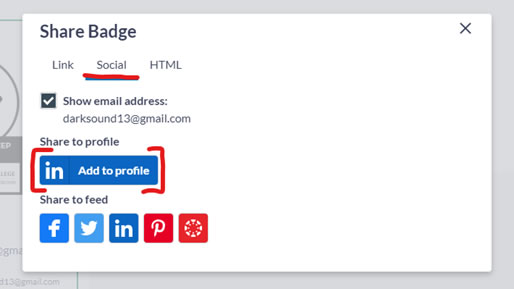
In the Share Badge popup, click the Social tab at the top (underlined), and then click the blue in Add to Profile button (bracketed).
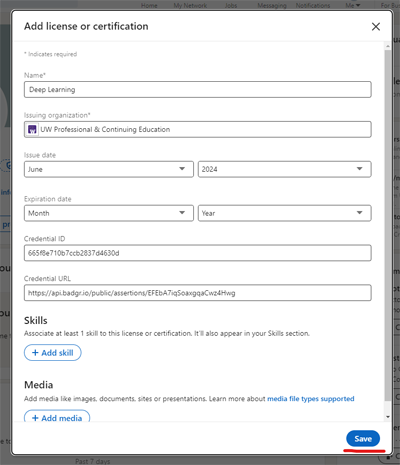
You will be prompted to log into your LinkedIn account.
After logging in, the Add license or certification popup has your badge information pre-populated. Just click the Save button and you have added your badge to your profile.